Original guide PHOTOS & DETAILS
Photos to request before buying a vintage football shirt
A practical photo and question checklist for comparing a listing with the shirt you want to buy.
Before buying a vintage football shirt, request photos of the actual item: full front and back, labels, print details, measurements and any disclosed damage. Save the listing and the seller’s answers as well. This helps you decide what meets your requirements and what remains unconfirmed; the information alone is not an authenticity certificate.
1. Define the shirt you are looking for
Record the team, season, kit and size. State whether you want a shirt made during the original season or would accept a later reissue. Keep separate notes about the shirt, name, number and patches. A design that matches your reference does not confirm when each element was made.
If the listing uses terms such as “retro”, “original” or “replica”, ask the seller to explain them. “Replica” can also describe an official fan version; the word alone does not classify the item. Where evidence is missing, write “unconfirmed” rather than filling the gap with an assumption.
2. Request these six sets of photos
- Full views: front and back of the same item, laid out in light that shows the fabric and seams. A catalogue image can illustrate the design, but cannot document the condition of that particular shirt.
- Labels: the neck label and every readable side of the internal labels. Request a wider photo to show their location and a close-up for the text; note any missing or cut labels.
- Crest, brand logo and sponsor: overall and close-up views, especially edges, cracks, lifting areas and missing sections.
- Name, number and patches: a complete view and close-ups. Ask whether they are period originals, later additions or replacements, or whether previous printing was removed. Keep undocumented details marked as unknown.
- Wear: collar, cuffs, hem, seams and each stated stain, pull, hole or repair. Ask the seller to identify the location so you can find it again when the shirt arrives.
- Measurements and accessories: photos showing a tape measure in the agreed positions, plus any swing tags, bags or other accessories listed. Confirm which items are included with the shirt.
3. Agree on a measurement method
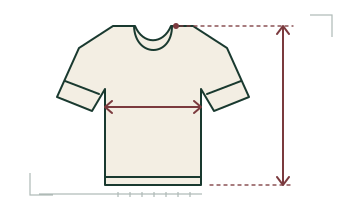
Compare the candidate with a shirt that already fits you. Record pit-to-pit width with the shirt laid flat, without stretching it, and length with the start and end points stated. For example, you can agree to measure from the high shoulder point beside the collar to the hem; use the same method for both shirts. Record centimetres and request a photo showing the tape.
Flat width is not your body’s chest circumference. Do not automatically translate a size M label into an equivalent size from another brand or era. If the seller cannot measure the item, keep the fit unconfirmed and decide whether that uncertainty is acceptable before buying.
4. Separate available evidence from open questions
Use this blank record when reviewing a candidate. A seller’s statement, a visible detail in a photograph and a specialist’s assessment are different types of information. A product code that matches a model is one clue to compare with the remaining evidence, rather than automatic purchase approval.
| Check | Available information | Still to confirm |
|---|---|---|
| Season and version | Description / reference: ______ | Basis for that information: ______ |
| Labels and code, if present | Photos received: ______ | Unreadable text, absence or discrepancy: ______ |
| Name, number and patches | Visible condition: ______ | Application dates or replacements: ______ |
| Measurements and wear | Documented measurements and defects: ______ | Unseen areas or differences: ______ |
| Price and delivery | Quoted amounts and terms: ______ | Outstanding costs, timing or conditions: ______ |
5. Copy this message to request the details
“I’m interested in this shirt: [link]. I’m looking for [team, season and version]. Could you send current photos of the front, back, internal labels, crest, sponsor and number? Please show any defects and tell me whether any printing has been added, replaced or removed. Please provide pit-to-pit width and length in centimetres, showing the tape and measurement points. Also confirm the included tags or accessories, price, and shipping and return terms for this sale. If a detail is not known, please mark it as unknown. Thank you.”
6. Confirm the purchase and prepare for arrival checks
Before authorising payment, summarise the selected item, the measurements supplied, the defects you accept and any open questions. Distinguish the shirt price, shipping within China, purchasing service, agreed checks and international shipping. If an amount can only be calculated after packing, label it as pending; do not treat a partial estimate as a confirmed total.
If you need an authenticity assessment, agree beforehand who can provide it, what evidence they need, when it will happen and what result they deliver. At arrival, the saved photos and answers provide a reference for comparing the received item with the selected one. Clarify any difference before authorising the next step. Cleaning, repairs, replacement prints and removal of accessories require a separate decision.
Already have a listing? See our buying service for a link from China. Still looking for a shirt? Prepare a sourcing request. To agree on arrival photos and packaging, read about inspection and consolidation.
From the listing name to the missing photograph
Keep the seller’s exact wording and separate design name, product line and stated item provenance. “Icon”, “Swingman”, “Authentic” and “replica” do not necessarily describe the same dimension. Use an official brand-and-sport reference as context, without treating it as proof about this item.
Turn each uncertainty into a specific request: complete label, inside detail, reverse of the print, measurements with reference points or document identification. Record what remains unresolved after the photographs arrive. A useful photograph reduces an uncertainty; it does not replace specialist review when needed.
Continue with: Authentic, Replica and reissue · Item record.
References informing these questions: Fanatics / NHL(联合发布,Fanatics Inc 刊载); NBA Store(页脚注明由 Fanatics 代表 NBA 运营).
Additional questions from communities and videos: u/YooSteez; u/urrax9(原帖);u/mdwsta4(术语讨论). Research used text or captions; archived records do not verify a thread’s current state. These are not site customers, demand statistics or evidence about our garments.
References and scope
This editorial checklist addresses questions raised in the second-hand buying guide by No Solo Camisetas and a buyer’s question about a damaged sponsor print. These sources document individual concerns; they do not authenticate an item or verify a seller. The table and message are original tools for organising a purchase, not a report on a real shirt.
PANDABUY JERSEYS
Already have a listing?
Bring the link, the photos you have received and your open questions to the chat. We review the available information and what needs clarifying before you authorise a purchase.
BLOG · THE COLLECTOR’S NOTEBOOK
Keep reading
Original guide
How to measure a vintage football shirt before buying
A size label is a starting point. Compare measurements taken the same way before choosing a shirt.
Read the guide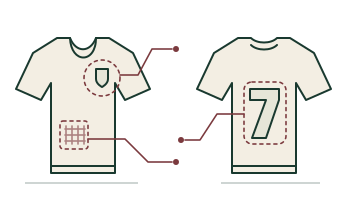
Original guide
Used football shirt condition: fabric, crest, sponsor and nameset
“Good condition” leaves questions open. Record each area, its evidence and what you accept before proceeding.
Read the guide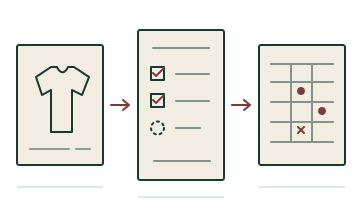
Original guide
How to prepare a vintage football shirt sourcing brief
The right shirt also needs to meet your fit, condition and budget requirements. Organise those limits before starting the search.
Read the guide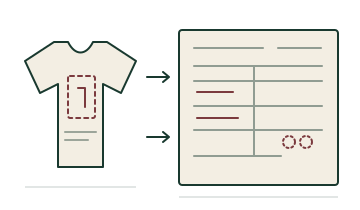
Original guide
A collection record: the shirt, nameset and open questions
One record per item to separate observations, seller statements and what remains unknown. Use it before buying and when agreeing arrival checks.
Read the guide
Original guide
Consolidating jerseys: what to check before sealing the package
A checklist to separate arrived items, unresolved questions and packing decisions before shipping several jerseys together.
Read the guide